830X Development Environment Setup*
1. SDK Acquisition*
The Apus SDK is hosted on a private GtiLab repository. Please read Register GitLab Account and provide your GitLab account to our sales manager, who will then authorize the account for code release through our project manager.
1.1 Downloading the Code*
- Navigate to the GitLab project and copy the project's git address as shown in the figure.
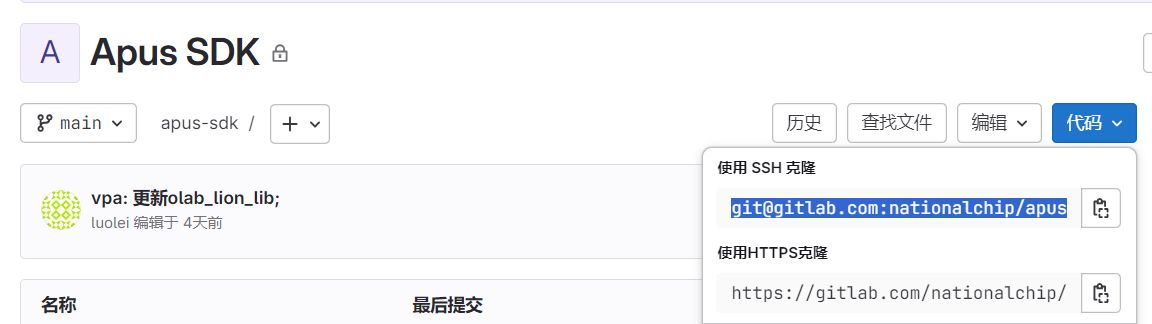
- Obtain the code:
$ git clone git@gitlab.com:nationalchip/apus-sdk.git
2. Setting Up the Development Environment*
2.1 Windows Environment Setup*
Step 1: Install T-HEAD CDS IDE*
- cds-windows-mingw-elf_tools-V5.2.14-20231027-1112.zip download address: http://yun.nationalchip.com:10000/l/JFO1fq
After downloading the IDE, double-click to install it.
Then manually update the toolchain patch (Note: This compiler patch must be applied, otherwise SDK compilation errors may occur):
-
Download Xuantie-900-gcc-elf-newlib-mingw-V2.10.2-20240904: http://yun.nationalchip.com:10000/l/JFO1fq
-
Update the CDS toolchain: Extract the toolchain archive "Xuantie-900-gcc-elf-newlib-mingw-V2.10.2-20240904.tar.gz", rename the directory "Xuantie-900-gcc-elf-newlib-mingw-V2.10.2" to "riscv64-elf-tools", and then replace the original "CDS installation directory\MinGW\riscv64-elf-tools"
Step 2: Open the Project*
- On the first launch, you will be prompted to select a working directory. You can set it arbitrarily. However, do not set it to the SDK project directory you intend to open. Pay special attention to this.
- Click "File" -> "Open projects From File System..."
- In the wizard interface, click "Directory..." and select the apus project directory.
- Click "Finish" at the bottom of the interface to import the project.
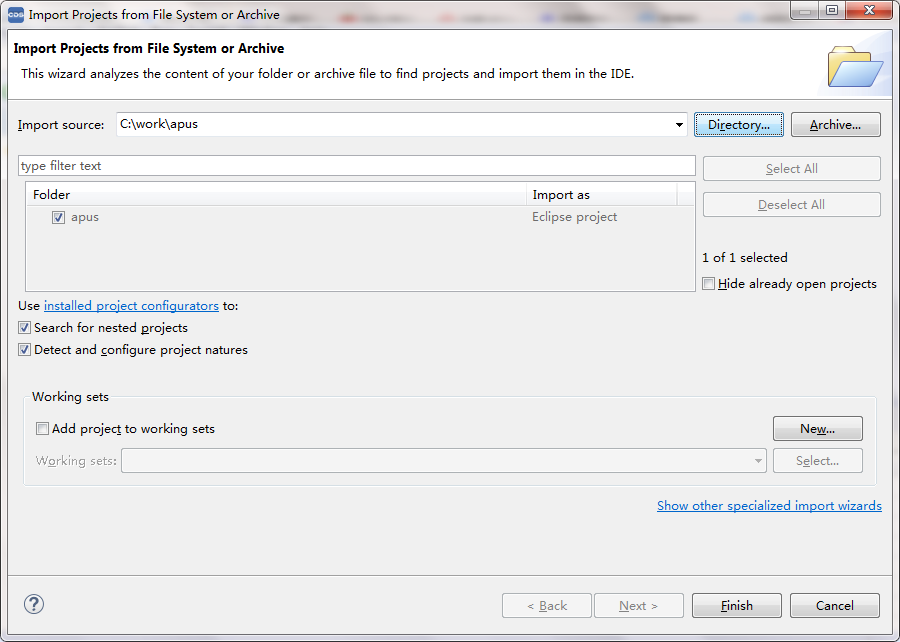
Step 3: Configure the Build Project*
-
- Configure the target app and board
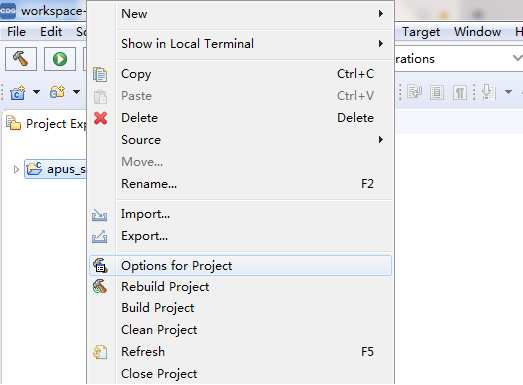
Right-click on the "apus_sdk" project item, click "Options for project", or click the "Options for project" icon.
Click "C/C++ Build" -> "Build Variables", edit the "app" and "board" Value fields respectively to specify the target app and board, then click "Apply and Close" at the bottom.
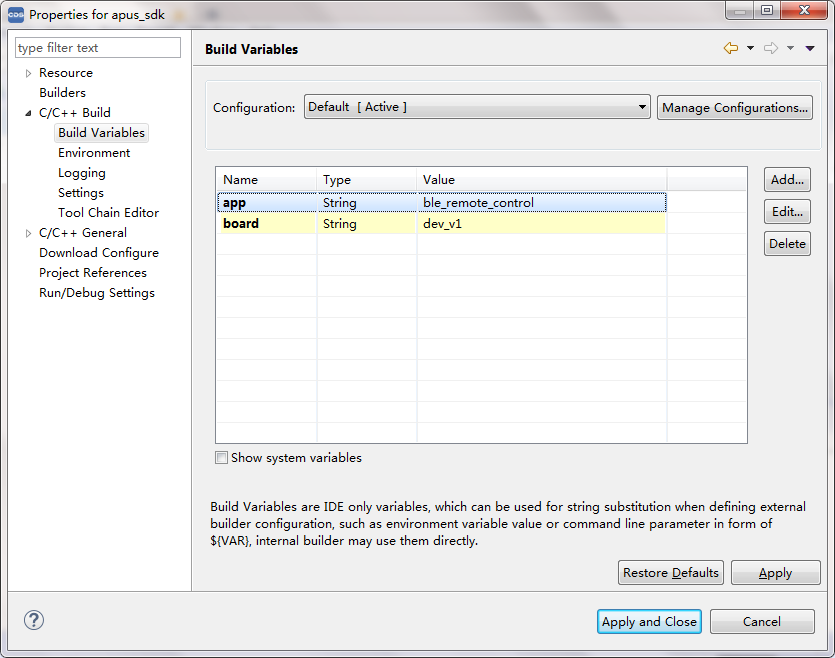
-
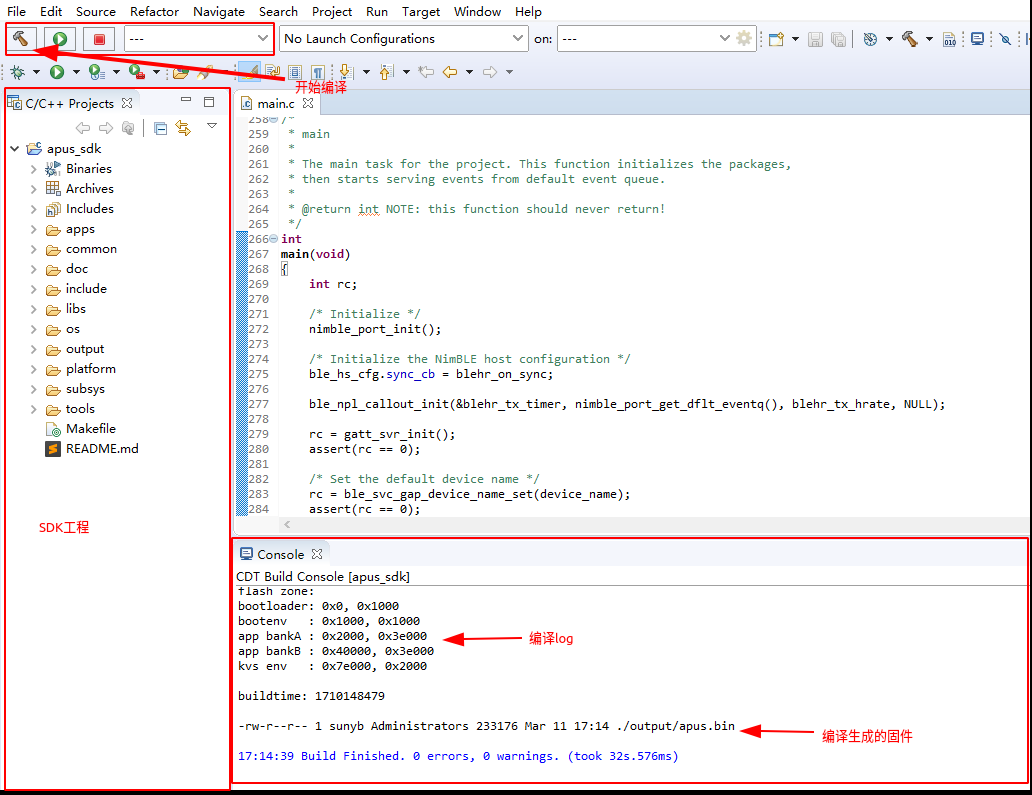
- Start Compilation
Right-click on the "apus_sdk" project item, click "Build Project", or click the "Build Project" icon to start compilation; The same method can be used for rebuild and clean operations; The compilation results are stored in the project's output directory. apus.bin is the flash firmware.
Step 4: Firmware Download*
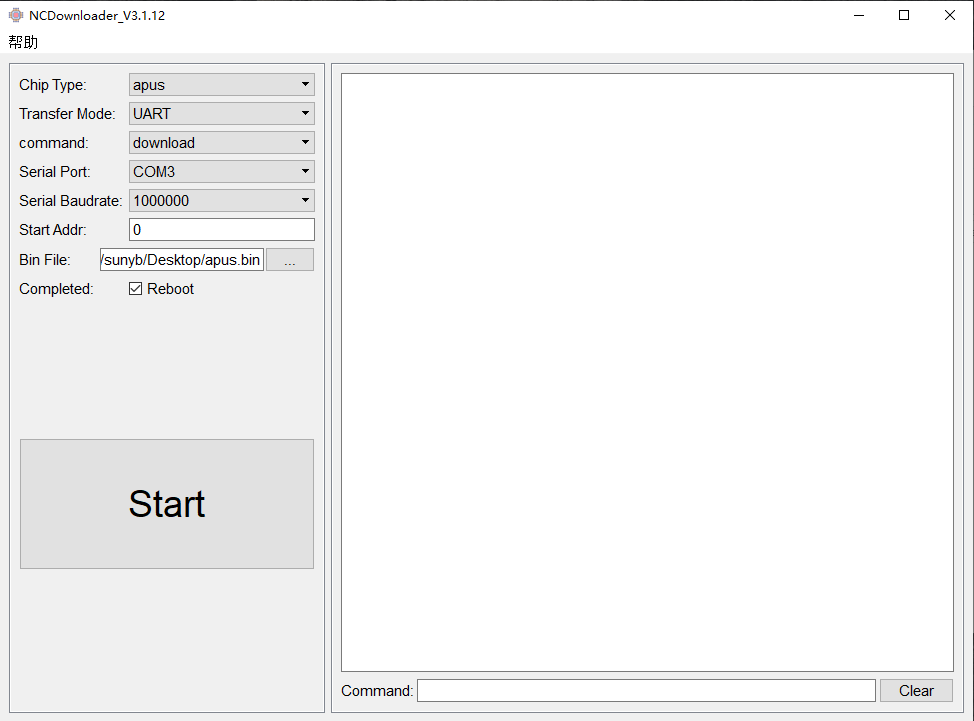
APUS supports two programming methods: UART and USB.
Download tool for programming: http://yun.nationalchip.com:10000/l/IF2mba
After extraction, open NCDownloader.exe.
- UART programming configuration is shown below.
Note
Select "apus" for "Chip Type", and click the "Bin File" button to select the flash firmware.
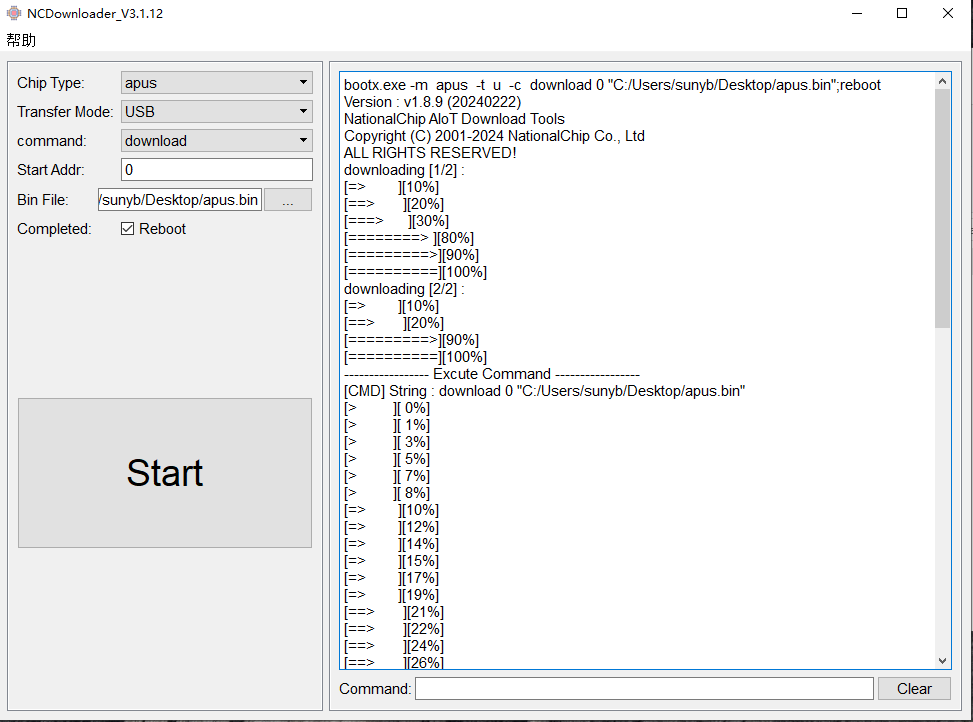
- USB programming configuration is shown below.
Note
Press and hold the boot key, then press reset. If prompted about abnormal device driver loading, follow the instructions to install the driver.
If using USB programming, the corresponding USB driver needs to be installed on Windows. Refer to the readme.txt inside for installation instructions. USB driver download: windows_usb_driver.zip
-
Click "Start", press and hold the boot key on the board, then press the reset key. Log information will appear on the right side of the tool during the download process. Release the boot key afterward.
-
If the UART is busy, you can also press and hold boot, press reset, then click "Start", and finally release the boot key.
-
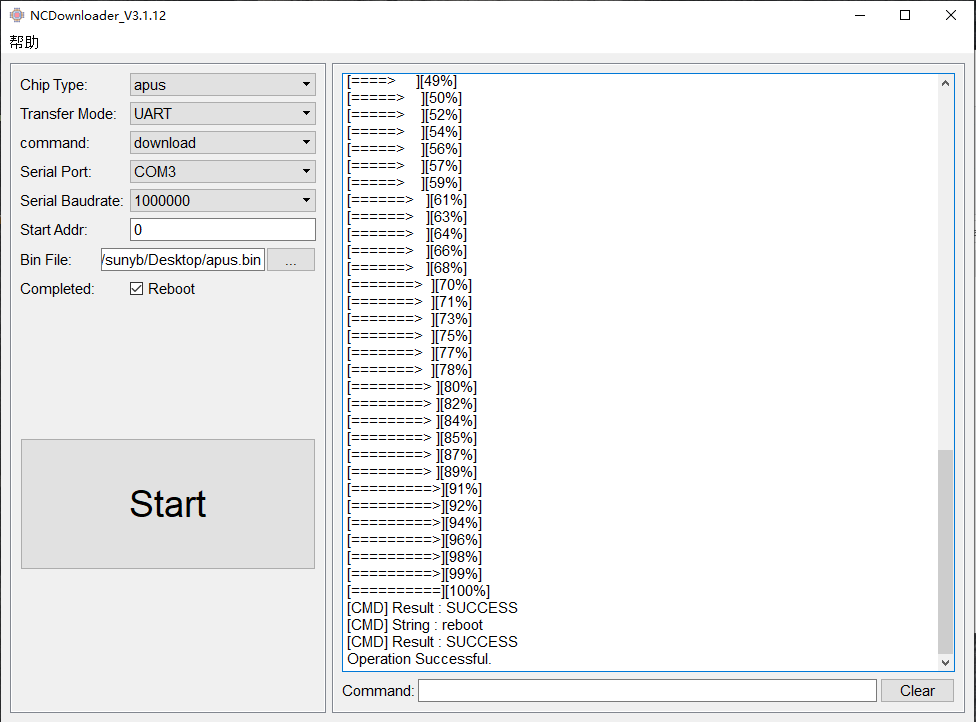
Upon successful download, "Operation Successful" will be printed. Press the reset key to restart the board.
Note
For detailed usage of the programming tool, please refer to: Tool Download
Step 5: GDB Debugging*
If you need to use a JTAG emulator for GDB debugging, refer to the steps below.
As shown in the figure, the emulator connects to the development board via JTAG pins, and the other end connects to the PC via USB.
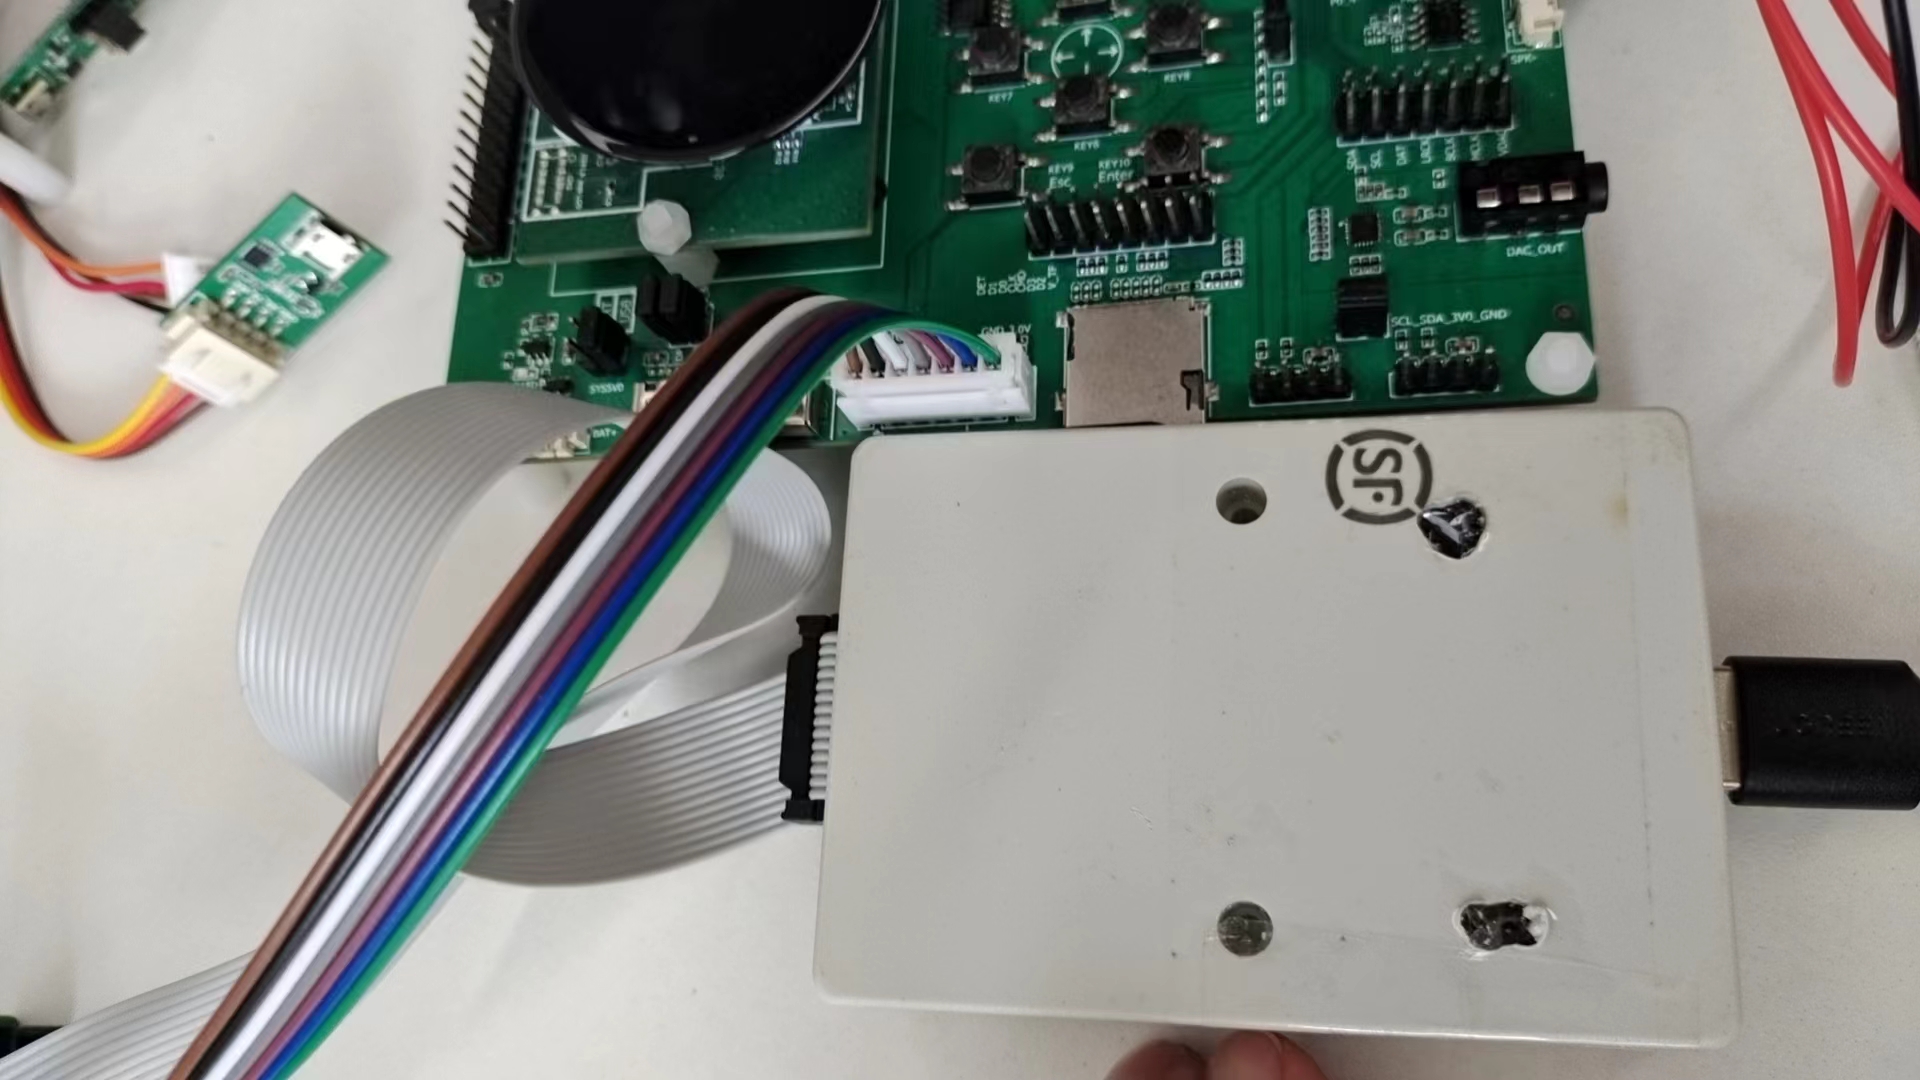
After installing the Windows compilation environment, a T-Head DebugServer tool will be installed as well. Alternatively, you can install it separately. T-Head-DebugServer-windows-V5.16.6-20221102-1510.zip: http://yun.nationalchip.com:10000/l/vFlneE
For usage details, please refer to this PDF:
It is recommended to click T-Head Debugger Server User Guide (ZH-CN) to open it in a new window.
First, connect the ICE, power on the development board, and ensure the PC can correctly recognize it. Then ensure that the firmware running on the development board does not reconfigure the JTAG pins (if unsure, use the NCDownloader.exe tool to erase the firmware on the board). Then open T-Head DebugServer. If the connection is successful, the following image will be displayed:
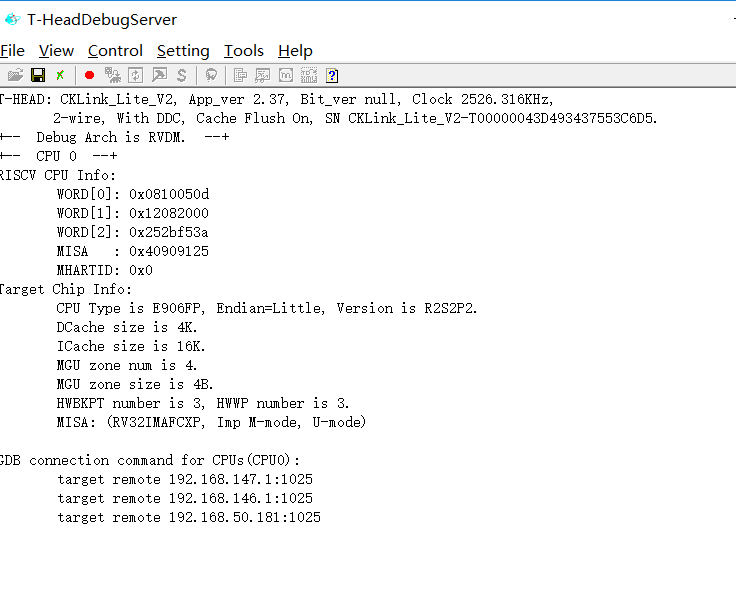
In the Windows command line, execute riscv64-unknown-elf-gdb.exe apus.elf riscv64-unknown-elf-gdb.exe is located in the path C-Sky\CDS\MinGW\riscv64-elf-tools\bin
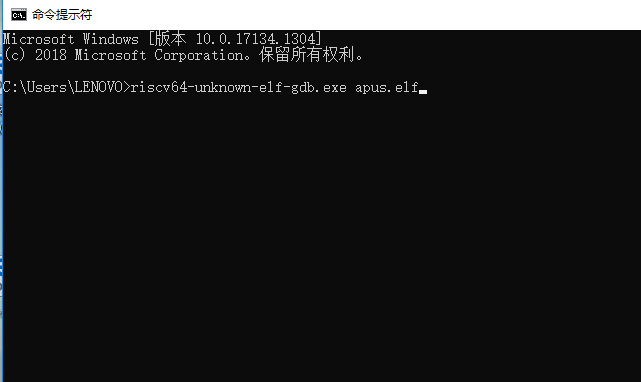
Then, according to the prompts, connect to the GDB Server, for example: target remote 192.168.50.181:1025
You can then use standard GDB commands for debugging.

Note: Since the code executes via XIP, do not use the ICE to load the firmware for execution. Please program the firmware to be debugged first, then debug via GDB.
2.2 Linux Environment Setup*
Ubuntu 64-bit mainstream versions.
Step 1: Set Up Your Ubuntu Environment*
Set Up the Ubuntu Environment
- Obtain the Apus SDK. Released by NationalChip personnel.
Step 2: Set Up the Compilation Environment*
- Toolchain installation.
Toolchain download address: http://yun.nationalchip.com:10000/l/3FjmDz
sudo tar zxvf Xuantie-900-gcc-elf-newlib-x86_64-V2.10.2-20240904.tar.gz -C /opt/
- Set system environment variables.
gedit $HOME/.bashrc
Add at the end:
export PATH=$PATH:/opt/Xuantie-900-gcc-elf-newlib-x86_64-V2.10.2/bin
Save and exit.
Step 3: Compile the SDK*
make app=
cd apus
Compile the specified app and board level
make app=ble_remote_control board=gx8301a_rc_demo
Step 4: Download Firmware*
- Use the bootx tool for flash download. Download command:
sudo ./tools/bootx/bootx -m auto -t s -d /dev/ttyUSB0 -r 1000000 -c "download 0 output/apus.bin"`
-
Point -d to the appropriate UART device based on the actual situation.
-
Execute the download command, press and hold the boot key, then press the reset key. Print information will appear during the download process. Release the boot key afterward.
-
If the UART is busy, you can also press and hold boot, press reset, execute the download command, and then release the boot key.
-
After the download is complete, press the reset key to start.
Step 5: GDB Debugging*
If you need to use a JTAG emulator for GDB debugging, refer to the steps below.
As shown in the figure, the emulator connects to the development board via JTAG pins, and the other end connects to the PC via USB.
- Download DebugServerConsole: http://yun.nationalchip.com:10000/l/TF38lZ and extract it.
- Install DebugServerConsole:
sudo ./T-Head-DebugServer-linux-x86_64-V5.16.6-20221102.sh -i, and follow the prompts to complete the installation. - Execute
DebugServerConsolein the command line to start the debug service. - Execute
riscv64-unknown-elf-gdb output/apus.elfin the apus project directory to enter online debugging.